
If you gaze up at the Moon a few days before or after new you will often see the beautiful glow of Earthshine, caused by sunlight being reflected from the Earth onto the unlit portion of the lunar surface.
Our eyes can discern this relatively easily as they can cope with the huge differential in brightness (dynamic range) across the lunar surface, cameras however have a much harder time dealing with this. If you expose correctly for the lit portion of the Moon you will have no chance of picking up the faint glow of Earthshine, if you expose for Earthshine then the lit portion of the Moon is completely overexposed. Here I’ll take you through how to create beautiful HDR images of the Moon in Photoshop using simple techniques so that hopefully you will be able to produce images like (or better than) the ones in this post.
First Shoot the Moon!
The first thing to do is to take your images of the Moon, you’ll need to take two exposures one with the crescent correctly exposed like the image on the left, and a second exposed for Earthshine (image on the right). You can see that the earthshine image has lost all crescent detail, this is what we are going to retrieve with this technique. The technical details are below the image, I’ve kept it simple here just using a camera and telephoto lens mounted on a standard tripod. You could also shoot through a telescope on a tracking mount - you just need to be sure you can fit the whole lunar disk in the field of view.

Left image 1/80 sec @ ISO1600, right image 1.3sec @ ISO1600. Both images shot using a Canon EOS 6D with Canon EF 70-300mm f/4-5.6L USM IS Telephoto lens at 300mm with 2x Extender
Processing Your Images in PhotoShop
Process your individual images in Photoshop (I’m using PhotoShop CC) as normal, flatten the images and save, then open your crescent image and paste the earthshine image on top of the crescent as a layer (shown here as Layer 1).

Select the Earthshine layer and change its opacity so that you can see the crescent below it. You can then use the Move tool to place it correctly over the crescent.

Change the opacity of the Earthshine layer back to 100% and click on the layer mask icon - shown as the white rectangle with dark circle in the image below.

With the layer mask selected (make sure you’ve clicked on it), select the Gradient Tool (shown below)

With the gradient tool select the edge of the lunar disk in the Earthshine image and drag your cursor towards the lit portion as shown below.

When you let go of the cursor you’ll see something like the image below, you can undo and repeat the process a few times until you get the effect you want. Don’t worry about the obvious sky gradient - we’ll deal with that.

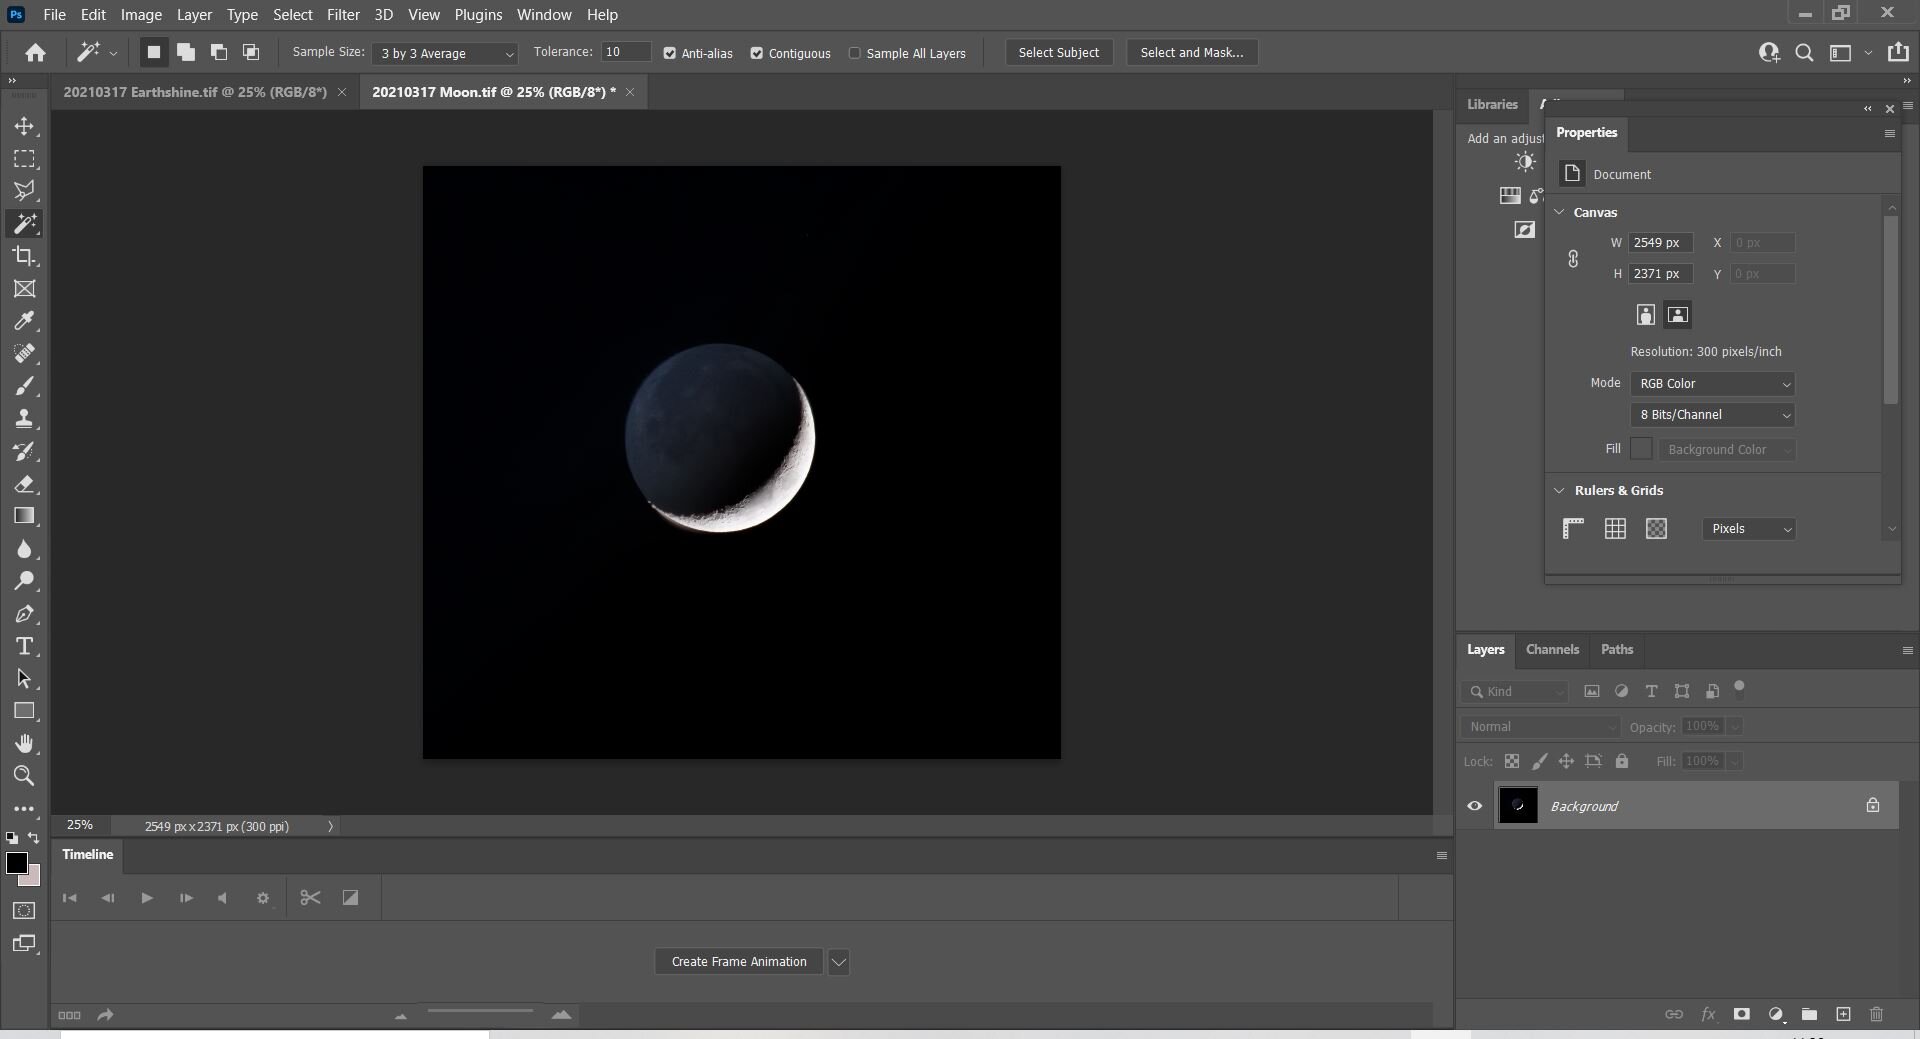
In the image below I’ve used the Magic Wand tool with a setting of 3 by 3 average and tolerance of 5 to select the lighter sky background, you’ll have to adjust these to your particular image. I’ve also feathered the selection by ~50 pixels.

Adjust the levels of the selected area so that it better matches the sky background of the lit crescent image.

A little to and fro will result in a nice even sky background with the crescent Moon and Earthshine both shown
The image below is the result, you can clean it up a little more, reduce noise and sharpen etc. but I wanted to show the result simply of applying the technique described above.

You can adapt the approach above for larger crescents like the one at the top of this post. For that image I created the composite image as described but then pasted it on top of the Earthshine image reducing its opacity until details were still visible on the lit portion but the overall effect was of a bright Moon with the light sky background of the Earthshine shot. I then used the eraser with the pasted image selected tool to carefully work around the lunar limb to blend the two images - a bit more work but I think it gives a great result. Good luck and make sure you share your results with me on Twitter or Instagram (@thelondonastro)!